Perspectiva general del Diseñador de impresión
El diseño de impresión ofrece crecientes capacidades de diseño e impresión. Se le permite añadir elementos a la vista del QGIS como, etiquetas de texto, imágenes, leyendas, barras de escala, formas básicas, flechas, tablas de atributos y marcos HTML. Puede cambiar el tamaño, grupo, alineación y posición y rotación de cada elemento y ajustar las propiedades para crear su diseño. El diseño se puede imprimir o exportar a formatos de imagen, PostScript, PDF o SVG (la exportación a SVG no funciona correctamente con algunas versiones recientes Qt4, debe intentarlo y comprobar de forma individual en el sistema). Puede guardar el diseño como una plantilla y cargarla de nuevo en otra sesión. Por último, la generación de varios mapas basados en una plantilla se puede hacer a través del generador de atlas.
Before you start to work with the Print Composer, you need to load some raster
or vector layers in the QGIS map canvas and adapt their properties to suit your
own convenience. After everything is rendered and symbolized to your liking,
click the  New Print Composer icon in the toolbar or
choose . You will be prompted to
choose a title for the new Composer.
To demonstrate how to create a map please follow the next instructions.
- On the left side, select the
 Add new map toolbar button
and draw a rectangle on the canvas holding down the left mouse button.
Inside the drawn rectangle the QGIS map view to the canvas.
- Select the
 Add new scalebar toolbar button and click
with the left mouse button on the Print Composer canvas. A scalebar will be
added to the canvas.
- Select the
 Add new legend toolbar button and draw a
rectangle on the canvas holding down the left mouse button.
Inside the drawn rectangle the legend will be drawn.
- Select the
 Select/Move item icon to select the map on
the canvas and move it a bit.
- While the map item is still selected you can also change the size of the map item.
Click while holding down the left mouse button, in a white little rectangle in one
of the corners of the map item and drag it to a new location to change it’s size.
- Click the Item Properties tab on the left lower panel and find the setting
for the orientation. Change the value of the setting Map orientation to
‘15.00° ‘. You should see the orientation of the map item change.
- Now, you can print or export your print composition to image formats, PDF or to SVG
with the export tools in Composer menu.
Por último, puede guardar su diseño de impresión con el botón  Guardar proyecto.
Puede añadir múltiples elementos al diseño de impresión. También es posible tener más de una vista de mapa o leyenda o barra de escala en el lienzo, en una o varias páginas. Cada elemento tiene sus propias propiedades y, en caso del mapa, su extensión. Si quiere borrar algún elemento del lienzo, puede hacerlo con Eliminar o la tecla Retroceso.
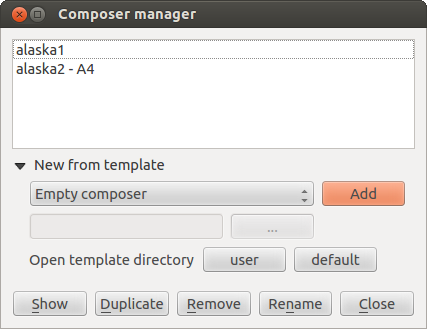
The Composer Manager is the main window to manage print composers in the project.
It helps you add new print composer, duplicate an existing one, rename or delete it.
To open the composer manager dialog, click on the  Composer Manager button in the toolbar or choose . It can also be reached from the main window of QGIS with
.
Figure Composer Manager:
The composer manager lists in its upper part all the available print composers in the project.
The bottom part shows tools that help to:
- show the selected composer(s): you can open multiple print composers in one-click
- duplicate the selected composer (available only if one print composer is selected):
it creates a new composer using the selected composer as template.
You’ll be prompted to choose a new title for the new composer
- rename the composer (also available only if one print composer is selected):
You’ll be prompted to choose a new title for the composer. Note that you can
also rename the composer by double-clicking on its title in the upper part
- remove the composer: the selected print composer(s) will be deleted from the project.
With the Composer Manager, it’s also possible to create new print composers as an
empty composer or from a saved template. By default, QGIS will look for templates
in user directory (~/.qgis2/composer_templates) or application’s one
(ApplicationFolder/composer_templates).
QGIS will retrieve all the available templates and propose them in the combobox.
The selected template will be used to create a new composer when clicking
Add button.
You can also save composer templates in another folder.
Choosing specific in the template list offers the ability to select such
template and use it to create a new print composer.
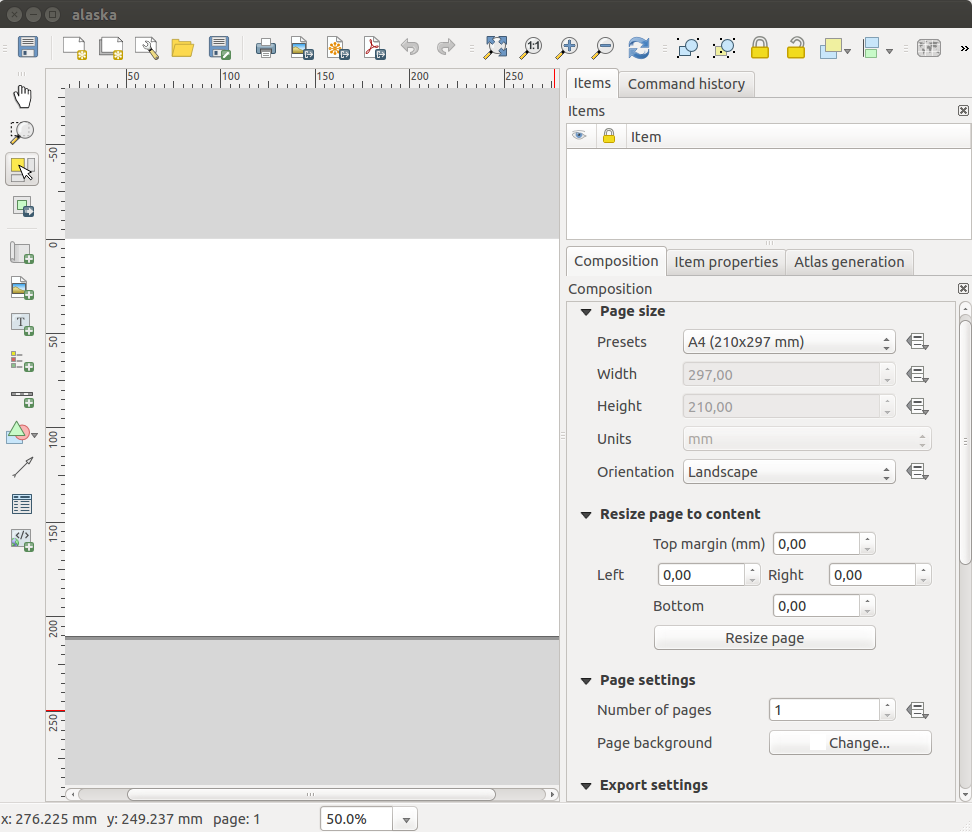
Al abrir el Diseñador de impresión le proporciona un lienzo en blanco que representa la superficie del papel al usar la opción de impresión . Inicialmente se encuentra botones del lado izquierdo del lienzo para añadir elementos al mapa del diseño; el lienzo del mapa actual de QGIS, etiquetas de texto, imágenes, leyendas, barras de escala, formas básicas, flechas, tablas de atributos y marcos HTML. En esta barra de herramientas también se encuentran los botones de barra de herramientas para navegar, acercar zum sobre un área y desplazar la vista y los botones de la barra de herramientas para seleccionar un elemento del diseñador del mapa y mover el contenido del elemento del mapa.
Figure_composer_overview shows la vista inicial del Diseño de impresión se añade antes que cualquier otro elemento.
Figure Composer Overview:
Del lado derecho del lienzo encontrará dos paneles. El panel superior tiene las pestañas Elementos e Historia de la orden y el panel inferior tiene las pestañas Diseño, Propiedades del elemento y Generación de atlas.
La pestaña Elementos proporciona una lista de todos los elementos del diseño añadidos al lienzo.
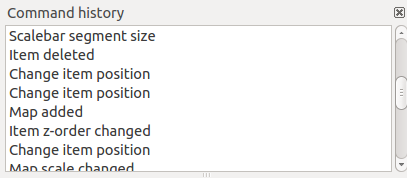
La pestaña Historia de la orden muestra una historia de todos los cambios aplicados al diseño. Con hacer un clic, es posible deshacer y rehacer pasos de ida y de vuelta a un cierto estatus
La pestaña Diseño le permite establecer el tamaño del papel, orientación, fondo de la página, número de páginas y calidad de impresión para el archivo de salida en dpi. Además, también se puede activar la casilla  Imprimir como ráster. Esto significa que todos los elementos serán convertidos a ráster antes de imprimirse o guardarse como PostScript o PDF. En esta pestaña, también puede personalizar la configuración de la cuadrícula o guías inteligentes.
- The Item Properties tab displays the properties for the selected
item. Click the
 Select/Move item icon to select
an item (e.g., legend, scale bar or label) on the canvas. Then click the
Item Properties tab and customize the settings for the selected
item.
La pestaña Generación de atlas le permite habilitar la generación de un atlas del diseño actual y da acceso a sus parámetros.
In the bottom part of the Print Composer window, you can find a status bar with
mouse position, current page number, a combo box to set the zoom level,
the number of selected items if applicable and, in the case of atlas generation,
the number of features.
In the upper part of the Print composer window, you can find menus and other toolbars.
All Print Composer tools are available in menus and as icons in a toolbar.
See a list of tools in table_composer_1.
The toolbars and the tabs can be switched off and on using the right mouse button
over any toolbar or through or
.
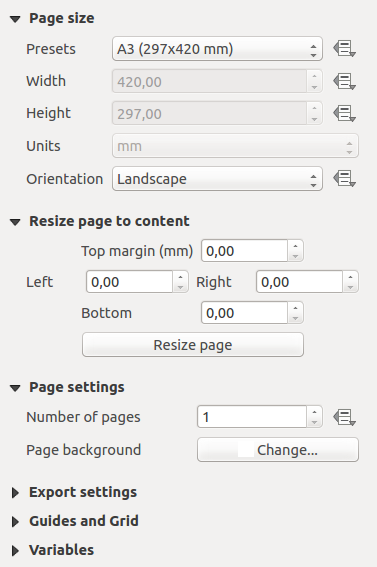
In the Composition tab, you can define the global settings of the
current composition.
Figure Composition 1:
You can choose one of the Presets formats for your paper sheet,
or enter your custom width, height and units.
You can also choose the page Orientation to use.
Composition can be divided into several pages. For instance, a first page can show
a map canvas, and a second page can show the attribute table associated with a
layer, while a third one shows an HTML frame linking to your organization website.
Set the Number of pages to the desired value. you can also custom the
Page Background with the color or the symbol you want.
The Page size options apply to all the pages in the composition. However, you can
modify the values using the data defined override options (see Botones de anulación de datos definidos.).
A custom page size can also be set, using the Resize page tool.
This creates an unique page composition, resizes the page to fit the current
contents of the composition (with optional margins).
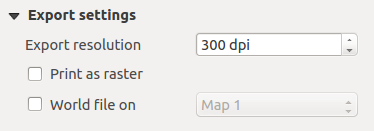
You can define a resolution to use for all exported maps in Export
resolution. This setting can however be overridden each time you are exporting a map.
When checked,  print as raster means all elements will be
rasterized before printing or saving as PostScript or PDF.
While exporting to an image file format, you can choose to generate a world file
by checking  World file on and select a map item.
The world file is created beside the exported map, has same name and contains
information to easily georeference it.
Figure Composition 2:
You can put some reference marks on your composition paper sheet to help you
place some items. These marks can be:
- simple lines (called Guides) put at the position you want. To do that,
ensure that Show Rulers and Show Guides in
menu are checked. Then, click and drag from within the ruler to the paper sheet.
A vertical or horizontal line is added to the paper and you can set its position
following the coordinates displayed at the left bottom of the composer dialog.
- or regular Grid.
Whether grids or guides should be shown is set in menu.
There, you can also decide if they might be used to snap composer items. The
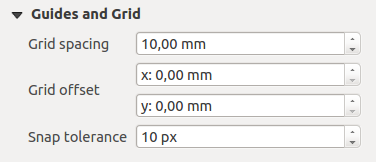
Grid and guides section lets you customize grid settings like
Grid spacing, Grid offset and Snap tolerance
to your need. The tolerance is the maximum distance below which an item is snapped
to a grid or a guide.
Figure Composition 3:
In the menu in QGIS main canvas, you can
also set the spacing, offset and snap tolerance of the grid as much as its style
and color. These options are applied by default to any new print composer.
During the layout process, it is possible to revert and restore changes.
This can be done with the revert and restore tools:
 Revert last change
 Restore last change
This can also be done by mouse click within the Command history tab
(see figure_composer_1). The History tab lists the last actions done within the composer.
Just select the point you want to revert to and once you do new action all
the actions done after the selected one will be removed.
Figure Composer 1:
The tab offers some options to manage selection and
visibility of items.
All the items added to the print composer canvas are shown in a list and
selecting an item makes the corresponding row selected in the list as well as
selecting a row does select the corresponding item in the print composer canvas.
This is thus a handy way to select an item placed behind another one.
Note that a selected row is shown as bold.
For any selected item, you can :
 set it visible or not,
 lock or unlock its position,
- order its Z position. You can move up and down each item in the list with a
click and drag. The upper item in the list will be brought to the foreground
in the print composer canvas.
By default, a newly created item is placed in the foreground.
- change the name by double-clicking the text.
Once you have found the correct position for an item, you can lock it by ticking
the box in  column. Locked items are not selectable on the canvas.
Locked items can be unlocked by selecting the item in the
tab and unchecking the tickbox or you can use the icons on the toolbar.
 New Print Composer icon in the toolbar or
choose File ‣ New Print Composer. You will be prompted to
choose a title for the new Composer.
 Add new map toolbar button
and draw a rectangle on the canvas holding down the left mouse button.
Inside the drawn rectangle the QGIS map view to the canvas.
 Add new scalebar toolbar button and click
with the left mouse button on the Print Composer canvas. A scalebar will be
added to the canvas.
 Add new legend toolbar button and draw a
rectangle on the canvas holding down the left mouse button.
Inside the drawn rectangle the legend will be drawn.
 Select/Move item icon to select the map on
the canvas and move it a bit.
 Guardar proyecto.
 Composer Manager button in the toolbar or choose Composer
‣ Composer Manager. It can also be reached from the main window of QGIS with
Project ‣ Composer Manager.