8.1. Lesson: 래스터 데이터 작업
래스터 데이터는 벡터 데이터와 많이 다릅니다. 벡터 데이터는 꼭짓점들로 구성된, 그리고 라인 및/또는 면과 연결되어 있을 수도 있는 개별 피처들로 이루어져 있습니다. 그러나 래스터 데이터는 일반 이미지와 같습니다. 실재 세계에 있는 오브젝트의 다양한 속성을 표현할 수도 있지만, 이 오브젝트들은 개별 오브젝트로 존재하는 것이 아니라 다양한 서로 다른 색상값을 가지는 픽셀을 이용하여 표현됩니다.
이 모듈에서 여러분은 기존 GIS 분석을 보충하는 데 래스터 데이터를 사용하게 될 것입니다.
이 강의의 목표: QGIS 환경에서 어떻게 래스터 데이터를 작업하는지 배우기.
8.1.1.  Follow Along: 래스터 데이터 불러오기
Raster data can be loaded with the same methods we used for vector data. However we suggest to use the Browser Panel.
Open the Browser Panel and expand the
exercise_data/rasterfolder.Load all the data in this folder:
3320C_2010_314_RGB_LATLNG.tif3320D_2010_315_RGB_LATLNG.tif3420B_2010_328_RGB_LATLNG.tif3420C_2010_327_RGB_LATLNG.tif
You should see the following map:
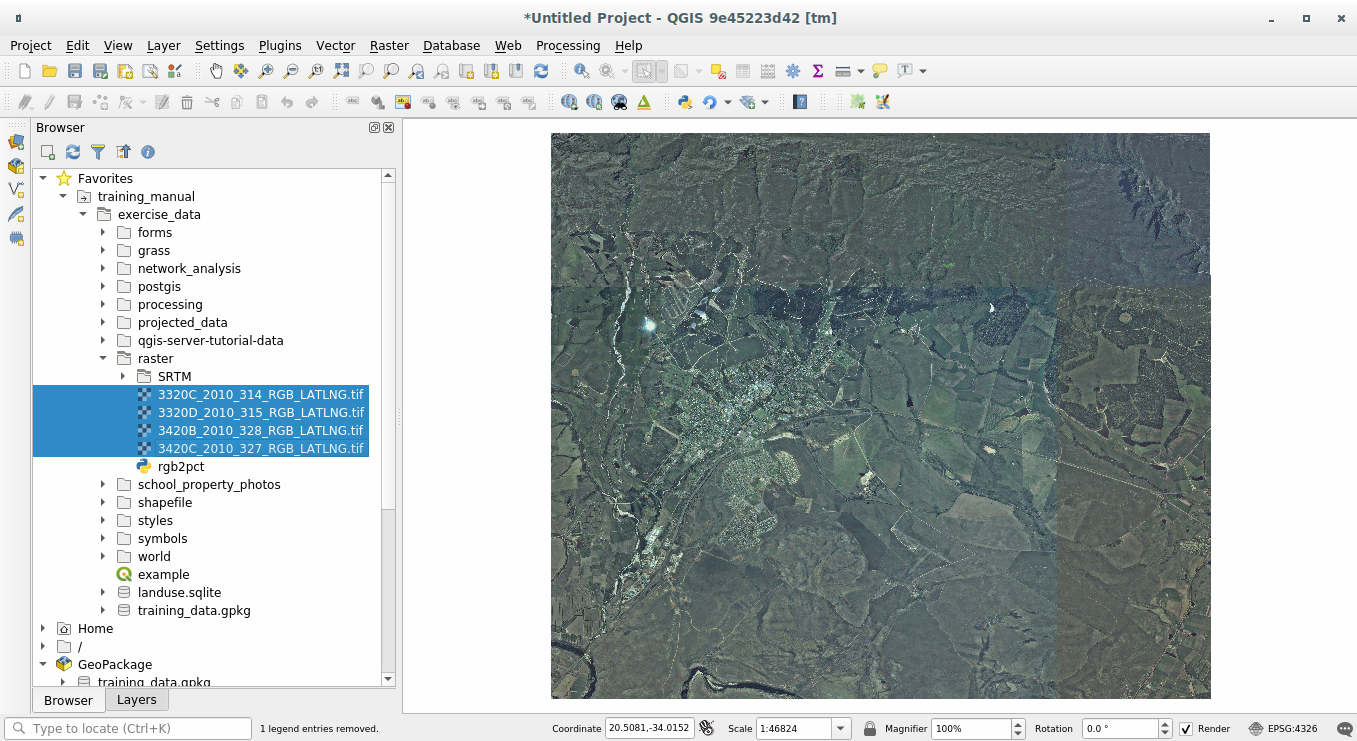
연구 지역 전체를 커버하는 항공사진 4장을 불러왔습니다.
8.1.2. Follow Along: 가상 래스터 생성
이제 이 화면에서 볼 수 있듯이, 사용자의 벡터 레이어가 사진 네 장 전체에 걸쳐 있습니다. 즉 항상 이 래스터 4개를 동시에 작업해야 한다는 뜻입니다. 그건 좀 불편하겠죠. 한 장의 (합성) 이미지 파일로 작업하는 편이 훨씬 낫지 않을까요?
Luckily, QGIS allows you to do exactly this, and without needing to actually create a new raster file, which could take up a lot of space. Instead, you can create a Virtual Raster. This is also often called a Catalog, which explains its function. It’s not really a new raster. Rather, it’s a way to organize your existing rasters into one catalog: one file for easy access.
To make a catalog we will use the .
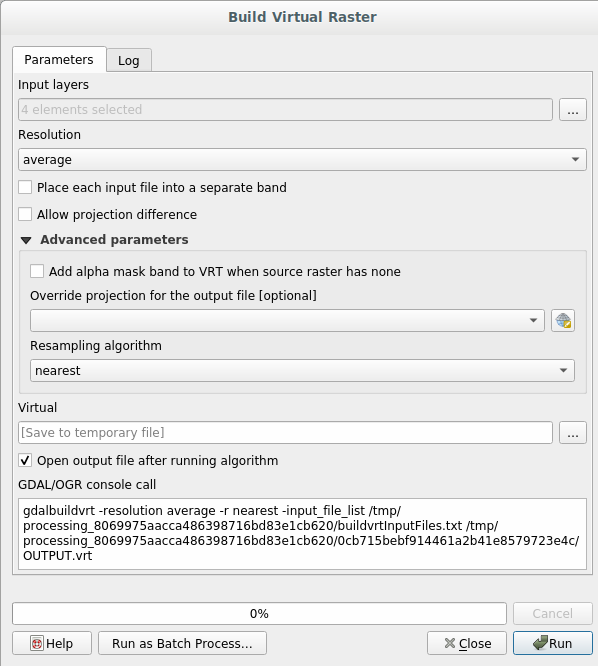
Open the Build virtual raster algorithm from the ;
In the dialog that appears click on the … button next to the Input layers parameter and check all the layers or use the Select All button;
Uncheck the Place each input file into a separate band parameter- Notice the text field below. What this dialog is actually doing is that it’s writing that text for you. It’s a long command that QGIS is going to run.
참고
Keep in mind that you can copy and paste the text in the
OSGeo Shell(Windows user) orTerminal(Linux and OSX users) to run the command. You can also create a script for each GDAL command. This is very handy when the procedure is taking a long time or when you want to schedule specific tasks. Use the Help button to get more help on the syntax of GDAL commands.Finally click on Run.
참고
As you know from the previous modules, Processing creates temporary layers by default. To save the file click on the … button.
You can now remove the original four rasters from the Layers Panel and leave only the output virtual catalog raster.
8.1.3.  래스터 데이터 변환
앞에서 설명한 방법으로 카탈로그를 이용해서 데이터셋을 가상으로 합치고 《실시간》으로 재투영할 수 있습니다. 그러나 비교적 긴 시간 동안 사용할 데이터를 준비하는 경우, 이미 합쳐지고 재투영된 새 래스터를 생성하는 편이 더 효율적일 수도 있습니다. 초기 준비 과정에 시간이 걸릴 수도 있지만, 맵 상에서 래스터를 사용할 때 속도를 향상시킬 수 있습니다.
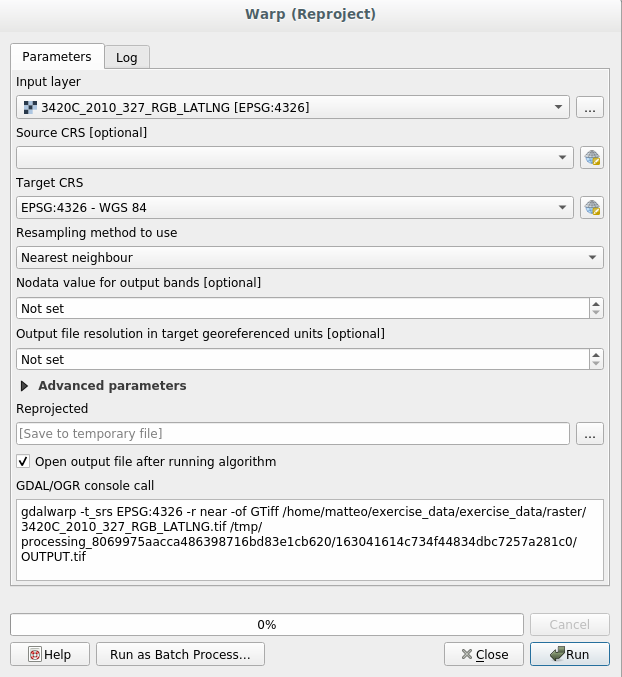
8.1.3.1. 래스터 재투영
Open Warp (reproject) from .
You can also reproject virtual rasters (catalogs), enable multithreaded processing, and more.
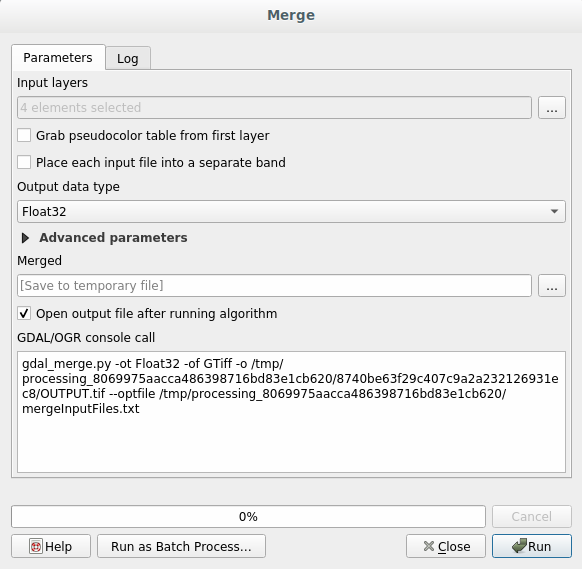
8.1.3.2. 래스터 합치기
If you need to create a new raster layer and save it to disk you can use the merge algorithm.
참고
Depending on how many raster files you are merging and their resolution, the new raster file created can be really big. Consider instead to create a raster catalog as described in the Create a Virtual Raster section.
Click on the Merge algorithm from the menu.
As we did for the Create a Virtual raster, use the … button to choose which layers you want to merge.
You can also specify a Virtual raster as input, and then all of the rasters that it consists of will be processed.
If you know the GDAL library, you can also add your own options by opening the Advanced parameters menu.
8.1.4. In Conclusion
QGIS를 통해 사용자의 기존 프로젝트에 래스터 데이터를 손쉽게 포함시킬 수 있습니다.
8.1.5. What’s Next?
다음 강의에서 항공사진이 아닌 래스터 데이터를 사용해서 래스터를 어떻게 심볼로도 활용할 수 있는지 배워보겠습니다.