8.1. Lesson: Les données raster
Les données raster sont un peu différentes des données vectorielles. Les données vectorielles possèdent des caractéristiques distinctes construites sur des sommets, et peut-être connectées avec des lignes et/ou des aires. Les données raster, cependant, sont comme des images. Bien qu’ils puissent présenter différentes propriétés d’objets dans le monde réel, ces objets n’existent pas comme des objets distincts ; au contraire, ils sont représentés en utilisant des pixels de différentes valeurs de couleurs différentes.
Lors de ce module, vous allez utiliser des données raster pour compléter votre analyse SIG existante.
Objectif de cette leçon :* Apprendre à travailler avec des données raster dans l’environnement QGIS.
8.1.1.  Follow Along: Chargement de Données Raster
Raster data can be loaded with the same methods we used for vector data. However we suggest to use the Browser Panel.
Open the Browser Panel and expand the
exercise_data/rasterfolder.Load all the data in this folder:
3320C_2010_314_RGB_LATLNG.tif3320D_2010_315_RGB_LATLNG.tif3420B_2010_328_RGB_LATLNG.tif3420C_2010_327_RGB_LATLNG.tif
You should see the following map:

Nous y voilà - quatre photographies aériennes couvrant notre région d’études.
8.1.2. Follow Along: Créer un Raster Virtuel
Maintenant, comme vous pouvez le voir à partir de cela, votre couche de solution réside dans les quatre photographies. Ce qui signifie que vous allez devoir travailler avec ces quatre rasters tout le temps. Ce n’est pas idéal ; il serait préférable d’avoir un fichier pour une image (composite), non ?
Luckily, QGIS allows you to do exactly this, and without needing to actually create a new raster file, which could take up a lot of space. Instead, you can create a Virtual Raster. This is also often called a Catalog, which explains its function. It’s not really a new raster. Rather, it’s a way to organize your existing rasters into one catalog: one file for easy access.
To make a catalog we will use the .
Open the Build virtual raster algorithm from the ;
In the dialog that appears click on the … button next to the Input layers parameter and check all the layers or use the Select All button;
Uncheck the Place each input file into a separate band parameter- Notice the text field below. What this dialog is actually doing is that it’s writing that text for you. It’s a long command that QGIS is going to run.
Note
Keep in mind that you can copy and paste the text in the
OSGeo Shell(Windows user) orTerminal(Linux and OSX users) to run the command. You can also create a script for each GDAL command. This is very handy when the procedure is taking a long time or when you want to schedule specific tasks. Use the Help button to get more help on the syntax of GDAL commands.Finally click on Run.
Note
As you know from the previous modules, Processing creates temporary layers by default. To save the file click on the … button.
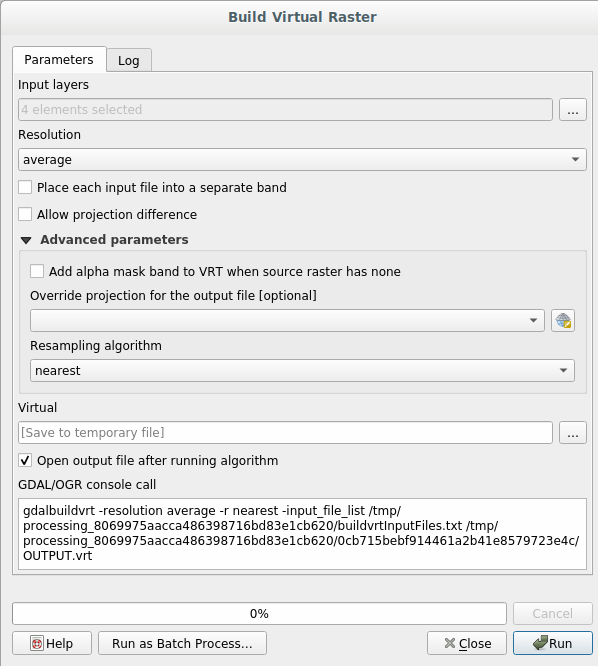
You can now remove the original four rasters from the Layers Panel and leave only the output virtual catalog raster.
8.1.3.  Transformation de données Raster
Les méthodes ci-dessus vous permettent de fusionner les jeux de données en utilisant un catalogue, et de les reprojeter « à la volée ». Cependant, si vous configurez les données que vous allez utiliser pendant un certain temps, il peut être plus efficace de créer de nouveaux rasters qui sont déjà fusionnés et reprojetés. Cela améliore les performances tout en utilisant les rasters dans une carte, mais cela peut prendre un certain temps à d’abord mettre en place.
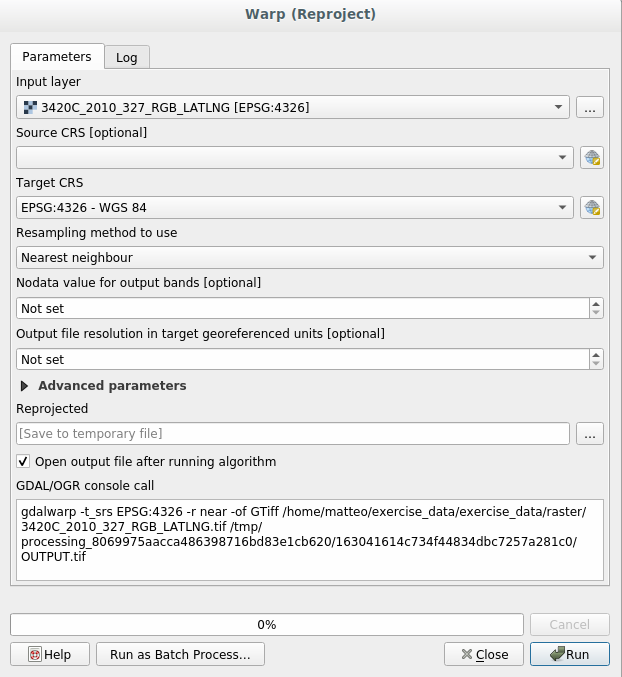
8.1.3.1. Reprojection de rasters
Open Warp (reproject) from .
You can also reproject virtual rasters (catalogs), enable multithreaded processing, and more.
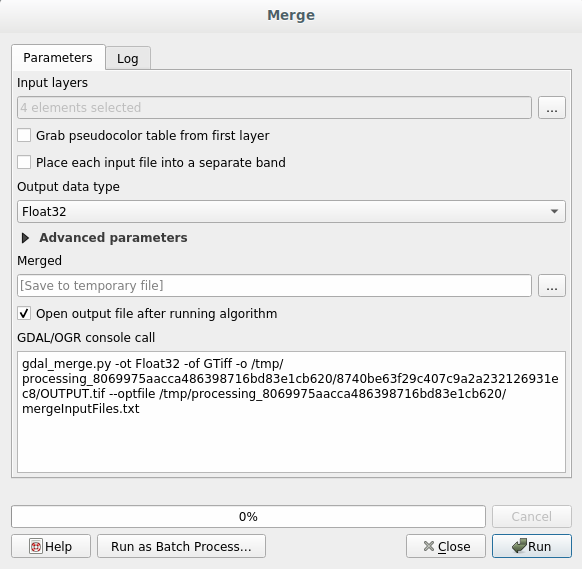
8.1.3.2. Fusion de rasters
If you need to create a new raster layer and save it to disk you can use the merge algorithm.
Note
Depending on how many raster files you are merging and their resolution, the new raster file created can be really big. Consider instead to create a raster catalog as described in the Create a Virtual Raster section.
Click on the Merge algorithm from the menu.
As we did for the Create a Virtual raster, use the … button to choose which layers you want to merge.
You can also specify a Virtual raster as input, and then all of the rasters that it consists of will be processed.
If you know the GDAL library, you can also add your own options by opening the Advanced parameters menu.
8.1.4. In Conclusion
Dans QGIS, il est facile d’inclure des données raster dans vos projets existants.
8.1.5. What’s Next?
Ensuite, nous utiliserons les données raster qui ne sont pas de l’imagerie aérienne, et verrons comment la symbolisation est ainsi utile dans le cas des rasters.