.
座標取得プラグイン
座標入力プラグインは使いやすく、選択した2つの座標参照系(CRS)について地図上のキャンバスに座標を表示する機能を提供します。
Figure Coordinate Capture 1:
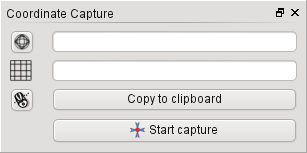
Coordinate Capture Plugin 
- Start QGIS, select
 Project Properties from the
Settings (KDE, Windows) or File (Gnome, OSX) menu
and click on the Projection tab. As an alternative, you can also
click on the
Project Properties from the
Settings (KDE, Windows) or File (Gnome, OSX) menu
and click on the Projection tab. As an alternative, you can also
click on the  CRS status icon in the lower
right-hand corner of the status bar.
CRS status icon in the lower
right-hand corner of the status bar.  オンザフライCRS変換を有効にする`チェックボックスをクリックし、プロジェクトの座標系を選択します (:ref:`label_projections も参照すること)。
プラグインマネージャで座標取得プラグインをロードします( load_core_plugin 参照 ) そして View ‣ Panels でそのダイアログが表示されるように設定してください,さらに
Coordinate Capture を有効にして下さい. 座標取得ダイアログは Figure figure_coordinate_capture_1 のように表示されます. Vector ‣ Coordinate Capture を選択すると,そこで Coordinate Capture が有効になっています.- Click on the
 Click to the select the CRS to use for
coordinate display icon and select a different CRS from the one you selected
above.
Click to the select the CRS to use for
coordinate display icon and select a different CRS from the one you selected
above. 座標入力を開始するには**[入力開始]**をクリックします。それからマップキャンバス上の任意の場所をクリックすると、プラグインは、あなたの選択したCRSの両方の座標を表示します。
マウスの座標追跡を可能にするには、
 マウストラッキング アイコンをクリックして下さい.
選択した座標をクリップボードにコピーすることができます。