Die Grafische Modellierung
The graphical modeler allows you to create complex models using a simple and easy-to-use interface. When working with a GIS, most analysis operations are not isolated, rather part of a chain of operations. Using the graphical modeler, that chain of operations can be wrapped into a single process, making it convenient to execute later with a different set of inputs. No matter how many steps and different algorithms it involves, a model is executed as a single algorithm, saving time and effort.
The graphical modeler can be opened from the Processing menu ().
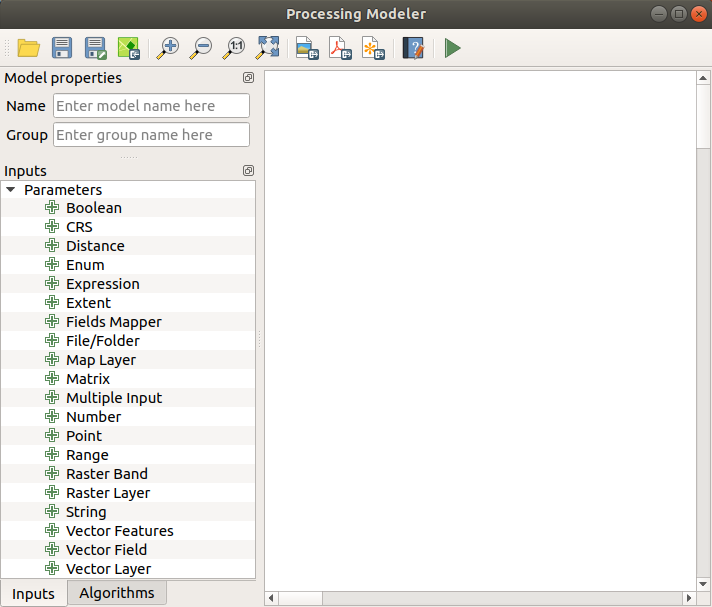
The modeler has a working canvas where the structure of the model and the workflow it represents are shown. The left part of the window is a panel with two tabs that can be used to add new elements to the model.
Modellierung
Das Erstellen eines Modells geht in zwei Schritten:
Definition von erforderlichen Eingaben. Diese Eingaben werden dem Paramterfenster hinzugefügt, so dass der Anwender Ihre Werte einstellen kann wenn er das Modell ausführt. Das Modell selber ist ein Algorithmus, also wird das Parameterfenster automatisch erstellt, so wie es mit allen Algorithmen, die in der Verarbeiten Umgebung zur Verfügung stehen, passiert.
Definition of the workflow. Using the input data of the model, the workflow is defined by adding algorithms and selecting how they use the defined inputs or the outputs generated by other algorithms in the model.
Definition von Eingaben
The first step is to define the inputs for the model. The following elements are found in the Inputs tab on the left side of the modeler window:
Boolean
CRS
Distance
Enum
Expression
Extent
Fields Mapper
File/Folder
Map Layer
Matrix
Multiple Input
Number
Point
Range
Raster Band
Raster Layer
Text
Vector Features
Vector Field
Vector Layer
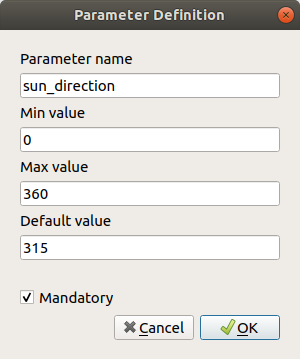
When double-clicking on an element, a dialog is shown that lets you define its characteristics. Depending on the parameter, the dialog will contain at least one basic element (the description, which is what the user will see when executing the model). When adding a numerical value, as can be seen in the next figure, in addition to the description of the parameter, you have to set a default value and the range of valid values.
Model Parameters Definition
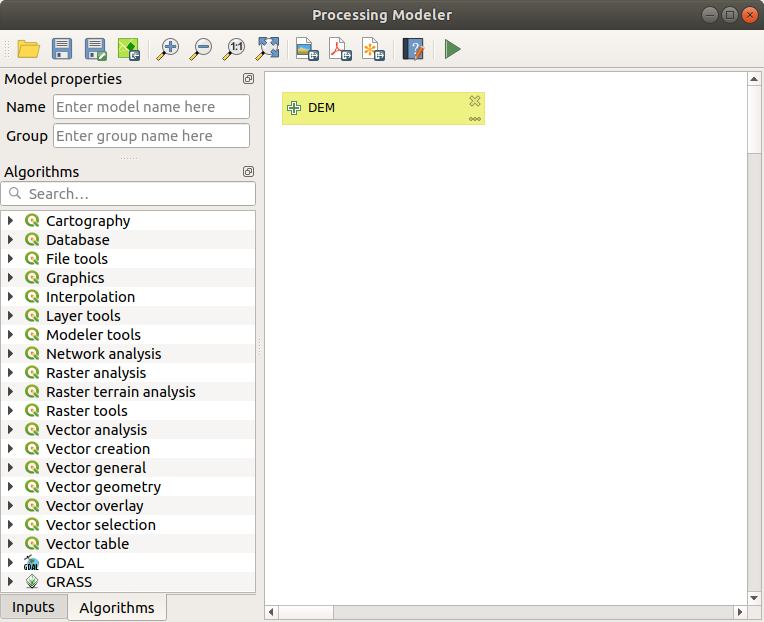
Für jede Eingabe wird ein neues Element im Modeller-Fenster erstellt.

Model Parameters
You can also add inputs by dragging the input type from the list and dropping it in the position where you want it in the modeler canvas.
Definition des Workflows
Once the inputs have been defined, it is time to define the algorithms of the model. Algorithms can be found in the Algorithms tab, grouped much in the same way as they are in the Processing toolbox.
Model Inputs
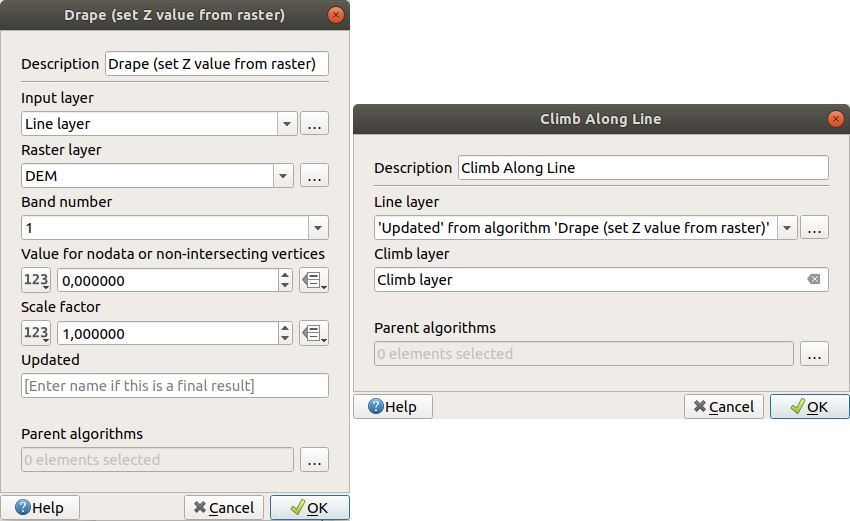
To add an algorithm to a model, double-click on its name or drag and drop it, just like for inputs. An execution dialog will appear, with a content similar to the one found in the execution panel that is shown when executing the algorithm from the toolbox. The ones shown next correspond to the QGIS ‚Drape (set Z value from raster)‘ algorithm and the QGIS ‚Climb along line‘ algorithm.
Model Algorithm parameters
Wie Sie sehen können bestehen einige Unterschiede. Anstelle des Dateiausgabefensters, das für die Einstellung des Dateipfades für Ausgabelayer und -tabellen verwendet wurde, wird hier eine einfaches Textfenster verwendet. Wenn der vom Algorithmus erstellte Layer nur ein vorläufiges Ergebnis ist, das als Eingabe für einen anderen Algorithmus verwendet wird und nicht als endgültiges Ergebnis vorgehalten werden soll, bearbeiten Sie dieses Textfenster nicht. Wenn Sie etwas eingeben heißt das, dass das Ergebnis endgültig ist und dass der Text den Sie vergeben die Beschreibung für die Ausgabe, die die Ausgabe ist, die der Benutzer sieht wenn das Modell ausgeführt wird, ist.
Das Auswählen des Wertes für jeden Parameter ist ebenfalls etwas schwierig, da es wichtige Unterschiede zwischen dem Kontext der Modellierung und der der Werkzeugkiste gibt. Wollen wir sehen wie man die Werte für jeden Typ von Parameter vorstellen.
Layer (Raster und Vektor) und Tabellen. Sie werden aus einer Liste ausgewählt, aber in diesem Fall sind die möglichen Werte nicht die Layer oder Tabellen, die momentan in QGIS geladen sind, sondern die Liste der Modelleingaben des entsprechenden Typs oder andere Layer oder Tabellen, die durch Algorithmen bereits erzeugt und zum Modell hinzugefügt wurden.
Numerical values. Literal values can be introduced directly in the text box. Clicking on the button beside the text box, expressions can be entered. Available variables for expressions include numerical inputs of the model, outputs from model algorithms and also statistical values from available layers within the model.
String. Literal strings can be typed in the corresponding text box. Clicking on the button beside the text box, expressions can be entered, as for numerical values.
Vector Field. The fields of a vector layer cannot be known at design time, since they depend on the selection of the user each time the model is executed. To set the value for this parameter, type the name of a field directly in the text box, or use the list to select a table field. The validity of the selected field will be checked at run time.
Sie werden in jedem Fall einen zusätzlichen Paramter genannt Parent algorithms, der nicht zugänglich ist wenn Sie den Algorithmus aus der Werkzeugkiste aufrufen, finden. Dieser Parameter ermöglicht es Ihnen die Reihenfolge in welcher die Algorithmen ausgeführt werden, indem ein Algorithmus ausdrücklich als Eltern des aktuellen definiert werden, festzulegen. Dies bewirkt, dass der Elternalgorithmus vor dem aktuellen ausgeführt wird.
When you use the output of a previous algorithm as the input of your algorithm, that implicitly sets the previous algorithm as parent of the current one (and places the corresponding arrow in the modeler canvas). However, in some cases an algorithm might depend on another one even if it does not use any output object from it (for instance, an algorithm that executes a SQL sentence on a PostGIS database and another one that imports a layer into that same database). In that case, just select the previous algorithm in the Parent algorithms parameter and they will be executed in the correct order.
Once all the parameters have been assigned valid values, click on OK and the algorithm will be added to the canvas. It will be linked to the elements in the canvas (algorithms or inputs) that provide objects that are used as inputs for the algorithm.
Elements can be dragged to a different position on the canvas. This is useful to make the structure of the model more clear and intuitive. Links between elements are updated automatically. You can zoom in and out by using the mouse wheel.
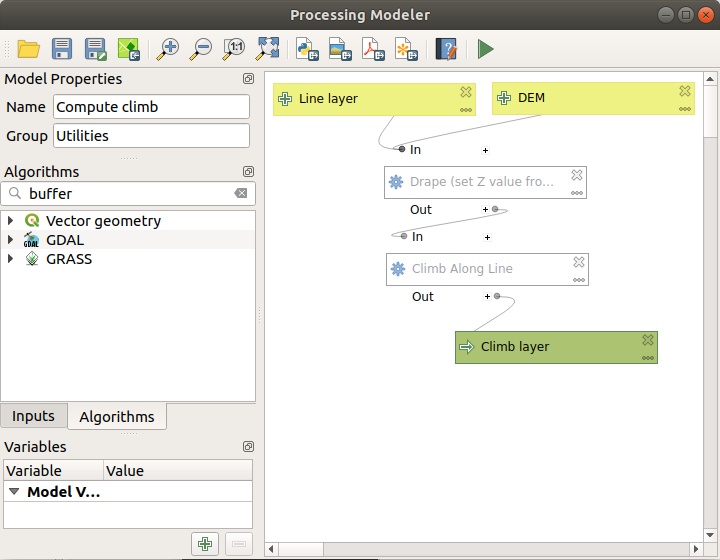
A complete model
You can run your algorithm any time by clicking on the Run button. In order to use the algorithm from the toolbox, it has to be saved and the modeler dialog closed, to allow the toolbox to refresh its contents.
Speichern und laden von Modellen
Use the Save button to save the current model and the
Open button to open any previously saved model.
Models are saved with the .model3 extension.
If the model has been already been saved from the modeler window,
you will not be prompted for a filename.
Since there is already a file associated with the model, that file
will be used for subsequent saves.
Before saving a model, you have to enter a name and a group for it in the text boxes in the upper part of the window.
Models saved in the models folder (the default folder when you
are prompted for a filename to save the model) will appear in the
toolbox in the corresponding branch.
When the toolbox is invoked, it searches the models folder for
files with the .model3 extension and loads the models they
contain.
Since a model is itself an algorithm, it can be added to the toolbox
just like any other algorithm.
Models can also be saved within the project file using the
 Save model in project button.
Models saved using this method won’t be written as
 .model3 files
on the disk but will be embedded in the project file.
Project models are available in the
![]() Project models menu of the toolbox.
Project models menu of the toolbox.
Die Verarbeitungsmodellierung kann im Verarbeitungskonfigurationsdialog in der Models Gruppe eingestellt werden.
Models loaded from the models folder appear not only in the
toolbox, but also in the algorithms tree in the Algorithms
tab of the modeler window.
That means that you can incorporate a model as a part of a bigger model,
just like other algorithms.
Models will show up in the Browser panel , and can be run from there.
Exporting a model as an image, PDF or SVG
A model can also be exported as an image, SVG or PDF (for illustration purposes).
Ein Modell editieren
You can edit the model you are currently creating, redefining the workflow and the relationships between the algorithms and inputs that define the model.
If you right-click on an algorithm in the canvas, you will see a context menu like the one shown next:
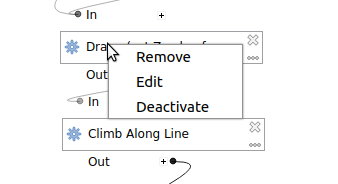
Rechtsklick auf den Modeler
Wird die Remove Option gewählt, bewirkt dies, dass der ausgewählte Algorithmus entfernt wird. Ein Algorithmus kann nur entfernt werden wenn keine weiteren Algorithmen von ihm abhängen. Das heißt, wenn keine Ausgabe des Algorithmus in einem anderen als Eingabe verwendet wird. Wenn Sie versuchen einen Algorithmus, von dem andere abhängen, zu entfernen, wird eine Warnmeldung wie die, die Sie unten sehen können, gezeigt:
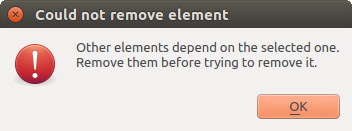
Kann Algorithmus nicht entfernen
Selecting the Edit option will show the parameter dialog of the algorithm, so you can change the inputs and parameter values. Not all input elements available in the model will appear as available inputs. Layers or values generated at a more advanced step in the workflow defined by the model will not be available if they cause circular dependencies.
Select the new values and click on the OK button as usual. The connections between the model elements will change in the modeler canvas accordingly.
Ein Modell kann teilweise ausgeführt werden, indem einige der Algorithmen deaktiviert werden. Um dies zu machen, rechtsklicken Sie auf ein Algorithmus Element und wählen Sie Deaktivieren. Der ausgewählte Algorithmus und alle diejenigen, die in dem Modell von ihm abhängen werden in grau angezeigt und nicht als Teil des Modells ausgeführt.
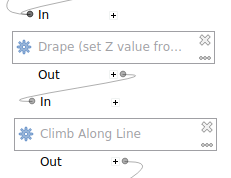
Modell mit deaktivierten Algorithmen
When right-clicking on an algorithm that is not active, you will see a Activate menu option that you can use to reactivate it.
Editieren der Modell-Hilfe Datei und der Metainformationen
You can document your models from the modeler itself. Just click on the Edit Model Help button, and a dialog like the one shown next will appear.
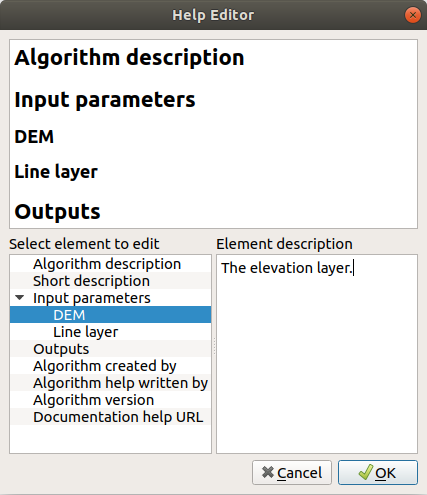
Editing Help
Auf der rechten Seite finden Sie eine einfache HTML-Seite, die anhand der Eingabeparameter und Ausgaben des Algorithmus erstellt wurde, zusammen mit einigen zusätzlichen Einträgen wie eine allgemeine Beschreibung des Modells und seines Autors. Wenn Sie den Hilfeeditor das erste Mal öffnen, sind alle diese Beschreibungen leer, Sie können Sie aber mit Hilfe der Elemente auf der linken Seite des Dialogs bearbeiten. Wählen Sie ein Element im oberen Teil aus und schreiben Sie seine Beschreibung in das Textfeld unten.
Modell-Hilfe wird als Teil des Modells selbst gespeichert.
Exporting a model as a Python script
As we will see in a later chapter, Processing algorithms can be called from the QGIS Python console, and new Processing algorithms can be created using Python. A quick way of creating such a Python script is to create a model and then to export is as a Python file.
To do so, right click on the name of the model in the Processing Toolbox and choose Export Model as Python Algorithm….
Zu den verfügbaren Algorithmen
You might notice that some algorithms that can be executed from the toolbox do not appear in the list of available algorithms when you are designing a model. To be included in a model, an algorithm must have the correct semantic. If an algorithm does not have such a well-defined semantic (for instance, if the number of output layers cannot be known in advance), then it is not possible to use it within a model, and it will not appear in the list of algorithms that you can find in the modeler dialog.