1.2. Pregătirea Datelor pentru Exerciții
Datele eșantion, livrate o dată cu Manualul de Instruire fac referire la orașul Swellendam și la împrejurimile sale. Swellendam este situat la aproximativ 2 ore înspre est de Cape Town, din Provincia Western Cape a Africii de Sud. Setul de date conține nume pentru entități, atât în limbile engleză cât și în afrikaans.
Oricine poate utiliza, fără dificultate, acest set de date, dar este posibil să preferați să utilizați date din propria țară sau din orașul natal. În cazul în care alegeți să faceți acest lucru, datele dvs. localizate vor fi utilizate în toate lecțiile, de la Modulul 3 până la modulul 7.2. Modulele ulterioare folosesc surse de date mai complexe, care pot fi valabile, sau nu, pentru regiunea dumneavoastră.
Note
Acest proces este destinat profesorilor sau utilizatorilor de QGIS experimentați care doresc să creeze seturi cu eșantioane de date localizate pentru cursurile lor. Seturile de date implicite sunt furnizate cu Manualul de instruire, dar este posibilă utilizarea acestor instrucțiuni dacă doriți să înlocuiți seturile de date implicite.
Note
The sample data used throughout the manual can be downloaded here: https://github.com/qgis/QGIS-Training-Data/archive/QGIS-Training-Data-v1.0.zip. You can save the files in a folder named exercise_data.
1.2.1.  Try Yourself
Note
Aceste instrucțiuni presupun că aveți o bună cunoaștere a QGIS, nefiind destinate utilizării ca material didactic.
If you wish to replace the default data set with localised data for your course, this can easily be done with tools built into QGIS. The region you choose to use should have a good mix of urban and rural areas, containing roads of differing significance, area boundaries (such as nature reserves or farms) and surface water, such as streams and rivers.
Deschideți un nou proiect QGIS
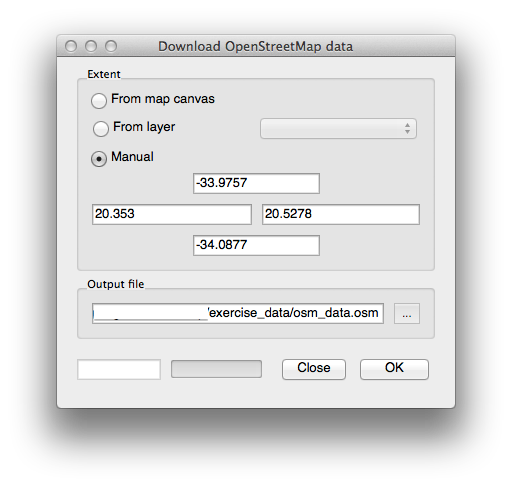
- In the Vector menu dropdown, select OpenStreetMap –> Download Data. You can then manually enter the co-ordinates of the region you wish to use, or you can use an existing layer to set the co-ordinates.
Alegeți o locație pentru a salva fișierul .osm rezultat, apoi faceți clic pe Ok:
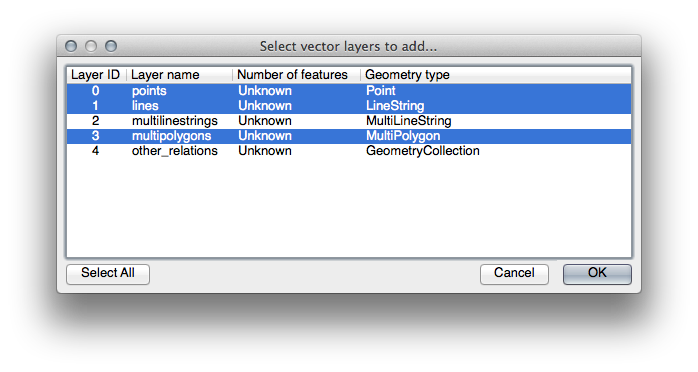
- You can then open the .osm file using the Add Vector Layer button. You may need to select All files in the browser window. Alternatively, you can drag and drop the file into the QGIS window.
În caseta de dialog care se deschide, selectați toate straturile, cu excepția straturilor
other_relationsșimultilinestrings.
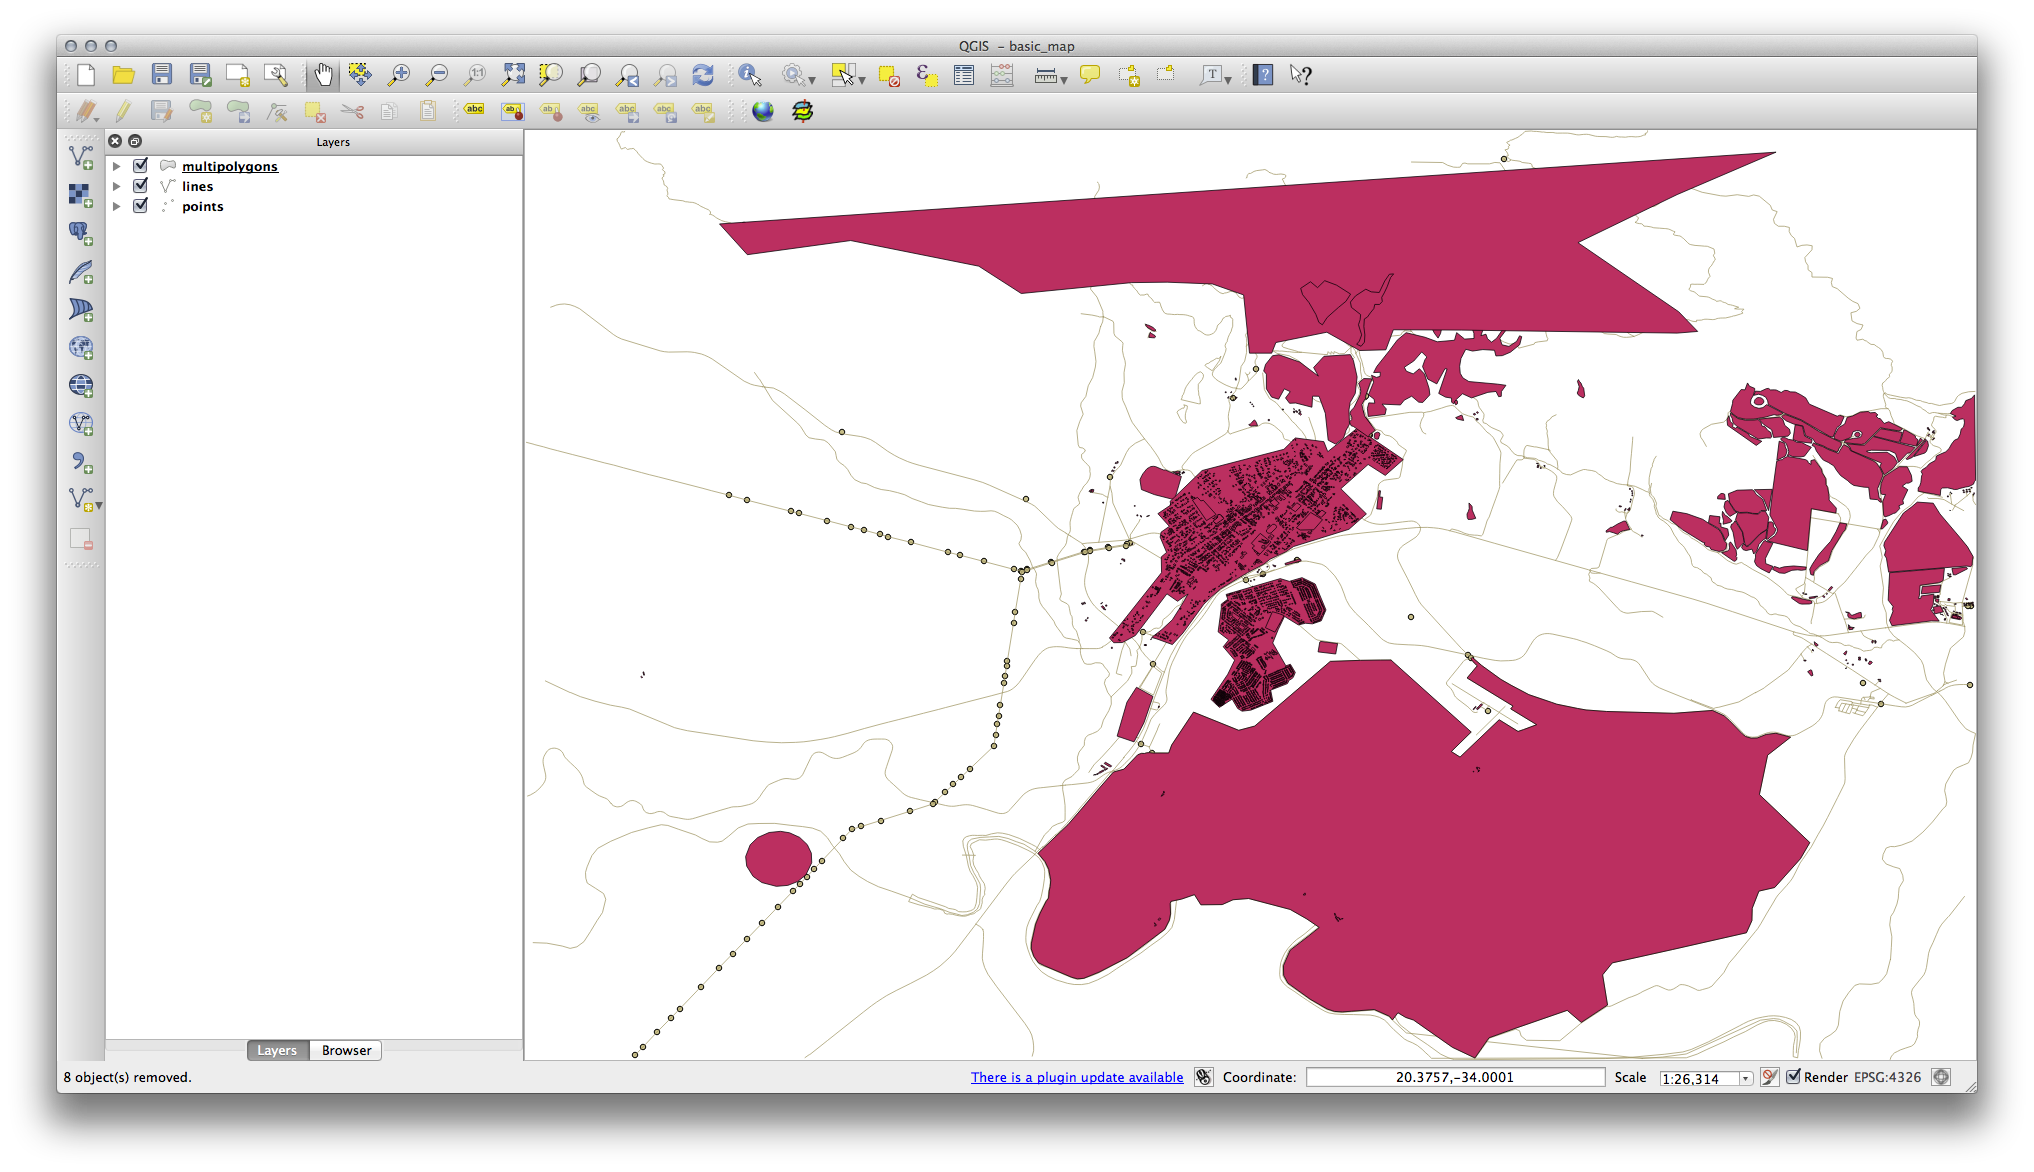
This will load three layers into your map which relate to OSM’s naming conventions (you may need to zoom in/out to see the vector data).
We need to extract the useful data from these layers, rename them and create corresponding shape files:
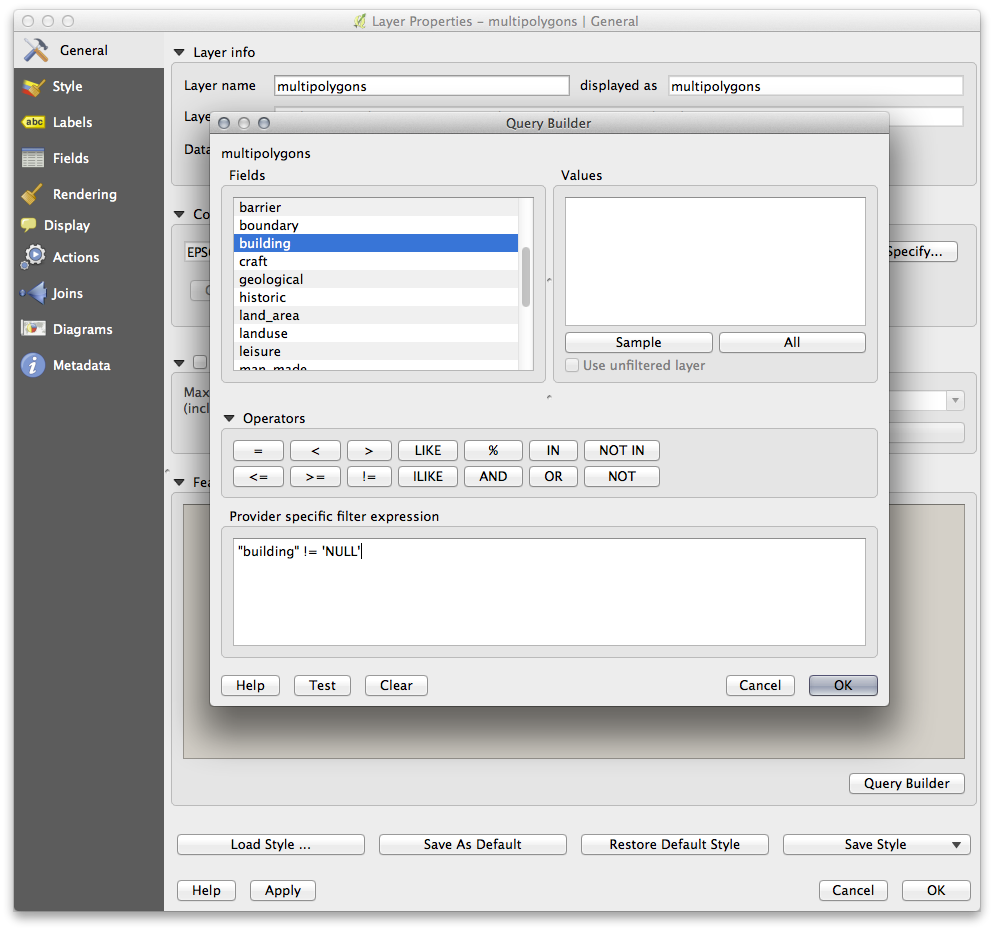
Mai întâi, efectuați dublu clic pe stratul
multipolygons, pentru a deschide fereastra de dialog a Proprietăților Stratului.În fila Generalități faceți clic pe Query Builder pentru a deschide fereastra Query builder.
This layer contains three fields whose data we will need to extract for use throughout the Training Manual:
buildingnatural(în mod specific, apă)landuse
You can sample the data your region contains in order to see what kind of results your region will yield. If you find that “landuse” returns no results, then feel free to exclude it.
You’ll need to write filter expressions for each field to extract the data we need. We’ll use the “building” field as an example here:
- Enter the following expression into the text area:
building != "NULL"and click Test to see how many results the query will return. If the number of results is small, you may wish to have a look at the layer’s Attribute Table to see what data OSM has returned for your region:
- Click Ok and you’ll see that the layer elements which are not buildings have been removed from the map.
Acum, trebuie să salvăm datele rezultate ca fișiere shape, pentru a le utiliza în timpul cursului:
Faceți clic-dreapta pe stratul multipolygons, apoi selectați Save As...
- Make sure the file type is
ESRI Shapefileand save the file in your newexercise_datadirectory, under a directory called “epsg4326”. - Make sure No Symbology is selected (we’ll add symbology as part of the course later on).
De asemenea, puteți selecta Add saved file to map.
Once the buildings layer has been added to the map, you can repeat
the process for the natural and landuse fields using the following
expressions:
Note
Make sure you clear the previous filter (via the Layer properties dialog) from the multipolygons layer before proceeding with the next filter expression!
natural: “natural = ‘water’”landuse: “landuse != ‘NULL’”
Each resulting data set should be saved in the “epsg4326” directory in your new
exercise_data directory (i.e. “water”, “landuse”).
You should then extract and save the following fields from the lines and
points layers to their corresponding directories:
lines: “highway != ‘NULL’” toroads, and “waterway != ‘NULL’” toriverspoints: “place != ‘NULL’” toplaces
Once you have finished extracting the above data, you can remove the multipolygons, lines and points layers.
You should now have a map which looks something like this (the symbology will certainly be very different, but that is fine):

The important thing is that you have 6 layers matching those shown above and that all those layers have some data.
The last step is to create a spatiallite file from the landuse layer for
use during the course:
Faceți clic-dreapta pe stratul
landuse, apoi selectați Save as...- Select SpatialLite as the format and save the file as
landuseunder the “epsg4326” directory. Clic pe Ok.
Ștergeți
landuse.shpși fișierele sale aferente (dacă au fost create).
1.2.2. Try Yourself Crearea Fișierelor SRTM DEM tiff
For Module 6 (Creating Vector Data) and Module 8 (Rasters), you’ll also need raster images (SRTM DEM) which cover the region you have selected for your course.
The CGIAR-CGI (http://srtm.csi.cgiar.org/) provides some SRTM DEM you can download from http://srtm.csi.cgiar.org/SELECTION/inputCoord.asp.
You’ll need images which cover the entire region you have chosen to use.
If you kept same data as the training manual, you can use the extent shown
in the set_osm_region figure above, otherwise adapt your extent.
Keep the GeoTiff format. Once the form is filled, click on the
Click here to Begin Search >> button and download the file(s).
Once you have downloaded the required file(s), they should be saved in the
exercise_data directory, under raster/SRTM subfolders.
1.2.3. Try Yourself Crearea Fișierelor tiff
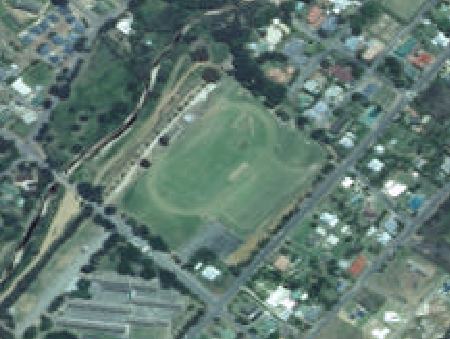
In Module 6, Lesson 1.2 shows close-up images of three school sports fields which students are asked to digitize. You’ll therefore need to reproduce these images using your new SRTM DEM tiff file(s). There is no obligation to use school sports fields: any three school land-use types can be used (e.g. different school buildings, playgrounds or car parks).
Pentru referință, imaginile din datele exercițiului sunt:

1.2.4.  Try Yourself Replace Tokens
Having created your localised dataset, the final step is to replace the tokens
in the conf.py file so that the appropriate names will appear in your
localised version of the Training Manual.
The tokens you need to replace are as follows:
majorUrbanName: this defaults to “Swellendam”. Replace with the name of the major town in your region.schoolAreaType1: this defaults to “athletics field”. Replace with the name of the largest school area type in your region.largeLandUseArea: this defaults to “Bontebok National Park”. Replace with the name of a large landuse polygon in your region.srtmFileName: this defaults tosrtm_41_19.tif. Replace this with the filename of your SRTM DEM file.localCRS: this defaults toWGS 84 / UTM 34S. You should replace this with the correct CRS for your region.