MapServer Export Plugin
You can use QGIS to ‘compose’ your map by adding and arranging layers, symbolizing them, customizing the colors and then creating a map file for MapServer.
Note
Currently the plugin only works when you use ‘Old Symbology’ in QGIS. ‘New Symbology’ is not yet supported.
Creating the Project File
The MapServer Export Plugin operates on a saved QGIS project file and not on the current contents of the map canvas and legend. This has been a source of confusion for a number of users. As described below, before you start using the MapServer Export Plugin, you need to arrange the raster and vector layers you want to use in MapServer and save this status in a QGIS project file.
Figure Mapserver Export 1:
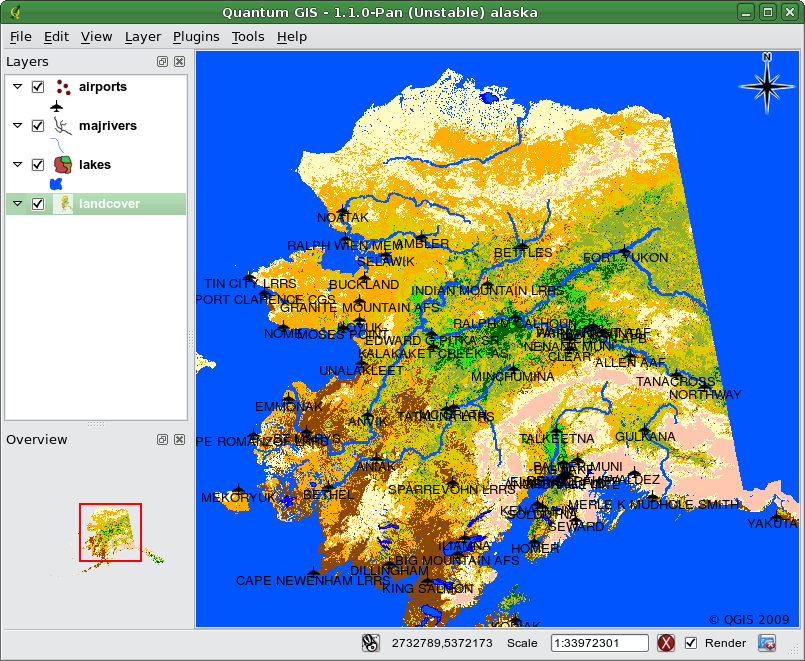
Arrange raster and vector layers for QGIS project file 
In this example, we demonstrate the four steps required to create a simple project file which can be used to create the MapServer map file. We use raster and vector files from the QGIS sample dataset Sample Data.
- Add the raster layer landcover.tif clicking on the
 Add Raster Layer icon.
 - Add the vector Shapefiles lakes.shp, majrivers.shp and
airports.shp from the QGIS sample dataset clicking on the
 Add Vector Layer icon.
 - Change the colors and symbolize the data as you like (for example see figure_mapserver_export_1)
- Save a new project named mapserverproject.qgs using
File ‣
 Save Project.
Creating the Map File
To use the Mapserver Export plugin from within QGIS, you need to enable the MapServer Export Plugin first using the Plugin Manager (see Loading a QGIS Core Plugin).
Figure Mapserver Export 2:
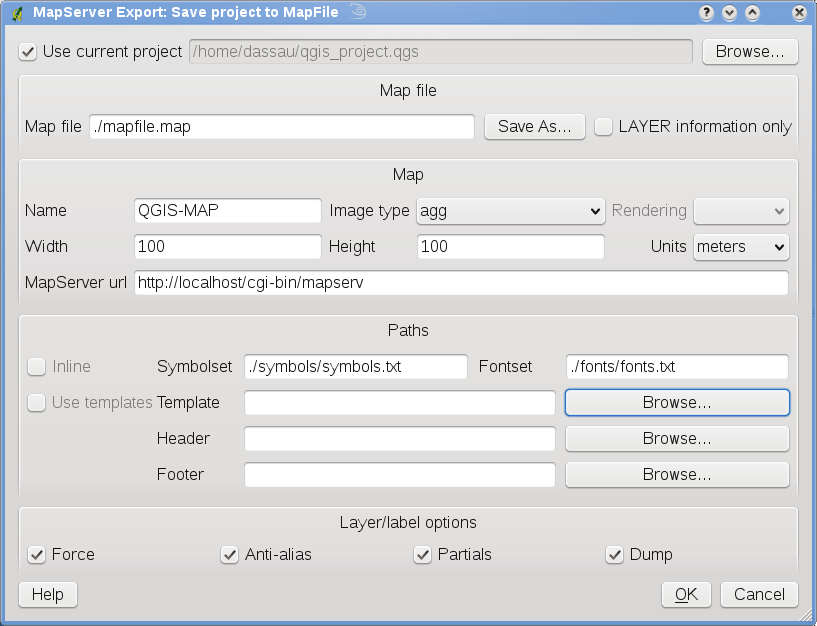
Export to MapServer Dialog
| Map file | Enter the name for the map file to be created. You can use the button at the right to browse for the directory where you want the map file created. |
| Qgis project file | Enter the full path to the QGIS project file (.qgs) you want to export. You can use the button at the right to browse for the QGIS project file. |
| Map Name | A name for the map. This name is prefixed to all images generated by the mapserver. |
| Map Width | Width of the output image in pixels. |
| Map Height | Height of the output image in pixels. |
| Map Units | Units of measure used for output. |
| Image type | Format for the output image generated by MapServer |
| Web Template | Full path to the MapServer template file to be used with the map file |
| Web Header | Full path to the MapServer header file to be used with the map file |
| Web Footer | Full path to the MapServer footer file to be used with the map file |
Only the inputs Map file and QGIS project file are required to create a map file, however by omitting the other parameters, you may end up creating a non-functional map file, depending on your intended use. Although QGIS is good at creating a map file from your project file, it may require some tweaking to get the results you want. For this example, we will create a map file using the project file mapserverproject.qgs we just created (see Figure_mapserver_export_2):
- Click the
 MapServer Export icon in the toolbar menu
to start the MapServer dialog (see Figure_mapserver_export_2).
MapServer Export icon in the toolbar menu
to start the MapServer dialog (see Figure_mapserver_export_2). - Enter the name (e.g., qgisproject.map) for your new map file.
- Browse and find the QGIS project file (e.g., mapserverproject.qgs) you previously saved.
- Enter a name (e.g., MyMap) for the map.
- Enter the width and height (e.g., 600 for the width and 400 for the height) for your output image.
- For this example, the layers are in meters, so we change the units to meters.
- Choose png for the image type.
- Click [OK] to generate the new map file qgisproject.map. QGIS displays the success of your efforts.
Figure Mapserver Export 3:
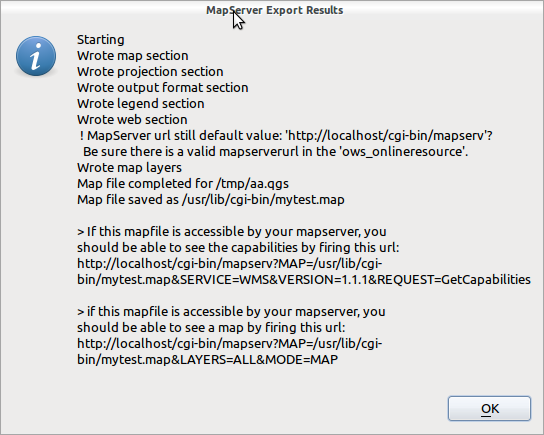
Export to MapServer Succesfull Dialog
You can view the map file in any text editor or visualizer. If you take a look, you’ll notice that the export tool adds the metadata needed to enable our map file for WMS.
Troubleshooting
If you get error messages from mapserver like:
loadSymbolSet(): Unable to access file. (./symbols/symbols.txt)
or:
msLoadFontset(): Unable to access file. Error opening fontset ./fonts/fonts.txt.
This means that that the map file is requesting for fonts or symbol definition files but that Mapserver cannot find those.
Either comment the lines containing those names in the map file (this is possible if you do not have labels or use styles from the symbols.txt). Or create those files (see below).
The most simple fonts.txt file (because arial is used in the QGIS generated map files) contains the following line
# either relative to the map file or a full path:
arial /usr/share/fonts/truetype/msttcorefonts/arial.ttf
The most simple symbols.txt file contains the definition of a circle symbol (because a circle symbol is used for point layers)
SYMBOLSET
    SYMBOL
    NAME "circle"
    TYPE ellipse
    FILLED true
    POINTS
    1 1
    END
    END
END
Testing the Map File
We can now test our work.
If the map file is accessible for you mapserver cgi you can use the one of the url’s from the success dialog.
Another option is using the shp2img tool to create an image from the map file. The shp2img utility is part of MapServer and FWTools. To create an image from our map:
- Open a terminal window
- If you didn’t save your map file in your home directory, change to the folder where you saved it.
- Run shp2img -m qgisproject.map -o mapserver\_test.png and display the image
This creates a PNG with all the layers included in the QGIS project file. In addition, the extent of the PNG will be the same as when we saved the project. As you can see in figure_mapserver_export_4, all information except the airport symbols are included.
Figure Mapserver Export 4:

Test PNG created by shp2img with all MapServer Export layers
Using Map File
If you plan to use the map file to serve WMS requests, you probably don’t have to tweak anything. If you plan to use it with a mapping template or a custom interface, you may have a bit of manual work to do. To see how easy it is to go from QGIS to serving maps on the web, take a look at Christopher Schmidt’s 5 minute flash video. He used an older version of QGIS (version 0.8), but the demo applies equally well to newer versions.