17.18. Modele mai complexe
Note
În această lecție vom lucra cu un model mai complex în modelatorul grafic.
Primul model pe care l-am creat în capitolul anterior a fost unul foarte simplu, doar cu o singură intrare și cu 3 algoritmi. Pot fi create mai multe modele complexe, cu diverse tipuri de intrări și cu mai multe etape. Pentru acest capitol vom lucra cu un model care creează un strat vectorial cu bazine hidrografice, pe baza unui DEM și a unei valori de prag. Acest lucru va fi foarte util pentru calcularea mai multor straturi vectoriale, care corespund unor praguri diferite, fără a fi nevoie de repetarea fiecărui pas de fiecare dată.
Această lecție nu conține instrucțiuni despre crearea unui model. Cunoașteți deja pașii necesari (dintr-o lecție anterioară) și ați văzut deja ideile de bază despre modelator, deci ar trebui să-l încercați singuri. Petreceți câteva minute încercând să creați modelul, și nu vă faceți griji despre greșeli. Nu uitați: mai întâi adăugați intrările, iar apoi algoritmii pe care îi folosiți pentru a crea fluxul de lucru.
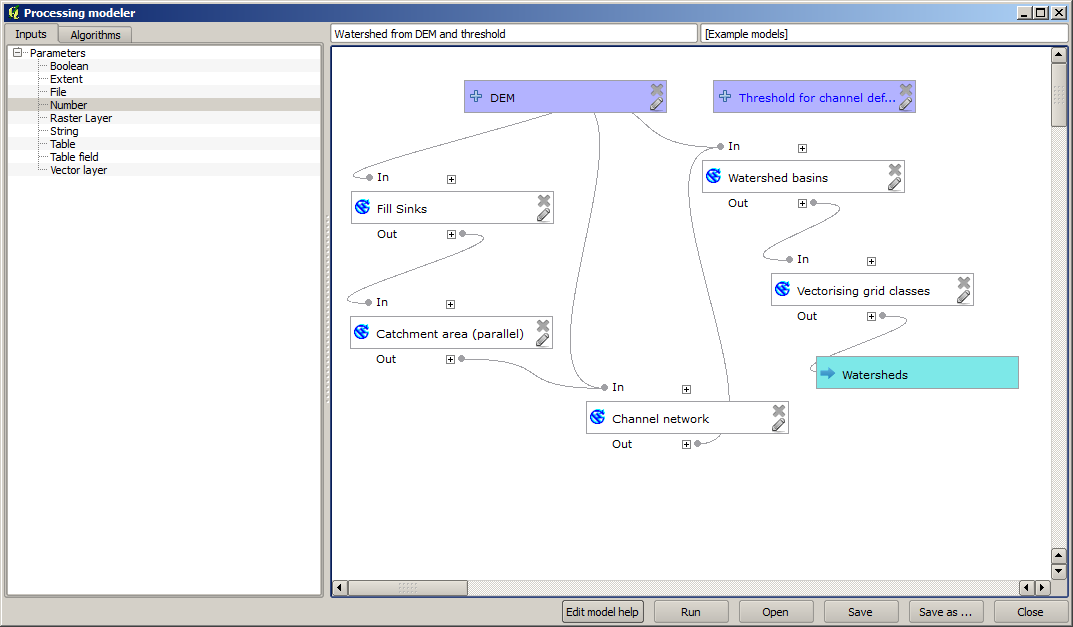
In case you could not create the full model yourself and you need some extra help, the data folder corresponding to this lesson contains an ‘almost’ finished version of it. Open the modeler and then open the model file that you will find in the data folder. You should see something like this.

This model contains all the steps needed to complete the calculation, but it just has one input: the DEM. That means that the threshold for channel definition use a fixed value, which makes the model not as useful as it could be. That is not a problem, since we can edit the model, and that is exactly what we will do.
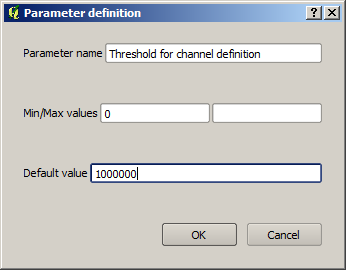
First, let’s add a numerical input. That will ask the user for a numerical input that we can use when such a value is needed in any of the algorithms included in our model. Click on the Number entry in the inputs tree, and you will see the corresponding dialog. Fill it with the values shown next.
Acum, modelul dvs. ar trebui să arate în felul următor:
The input that we have just added is not used, so the model hasn’t actually changed. We have to link that input to the algorithm that uses it, in this case the Channel network one. To edit an algorithm that already exists in the modeler, just click on the pen icon on the corresponding box in the canvas. If you click on the Channel network algorithm, you will see something like this.
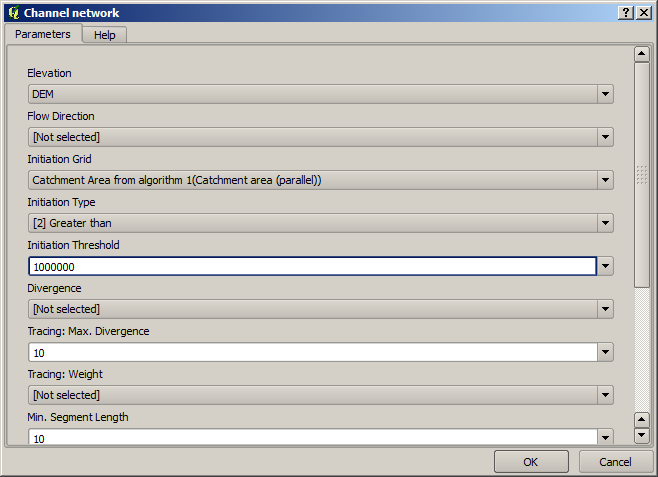
The dialog is filled with the current values used by the algorithm. You can see that the threshold parameter has a fixed value of 1,000,000 (this is also the default value of the algorithm, but any other value could be put in there). However, you might notice that the parameter is not entered in a common text box, but in an option menu. If you unfold it, you will see something like this.

The input that we added is there and we can select it. Whenever an algorithm in a model requires a numerical value, you can hardcode it and directly type it, or you can use any of the available inputs and values (remember that some algorithms generate single numerical values. We will see more about this soon). In the case of a string parameter, you will also see string inputs and you will be able to select one of them or type the desired fixed value.
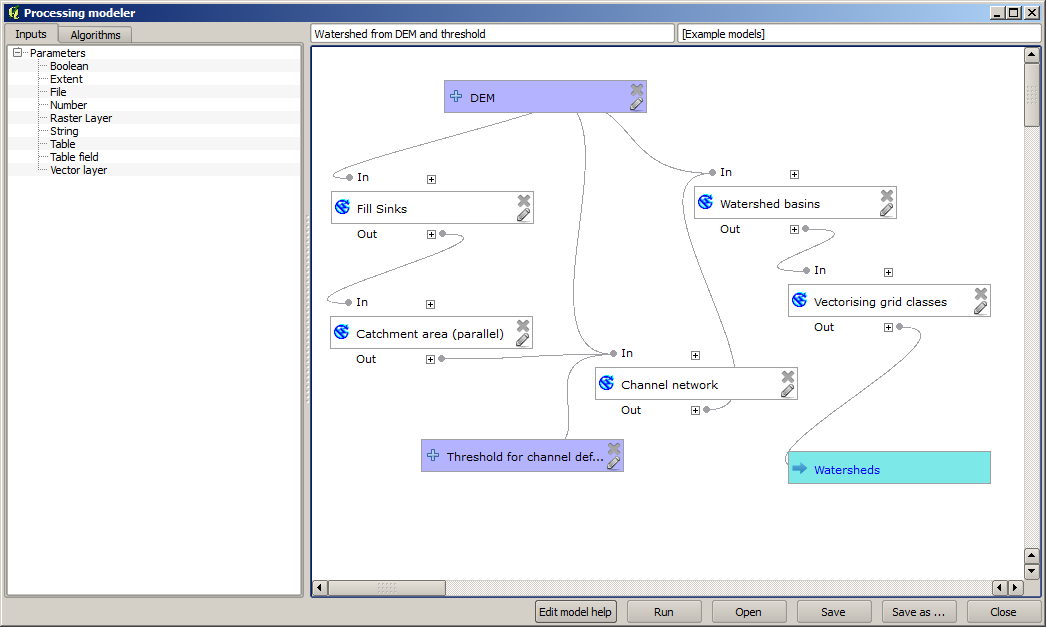
Select the Threshold input in the Threshold parameter and click on OK to apply the changes to your model. Now the design of the model should look like this.
The model is now complete. Try to run it using the DEM that we have used in previous lessons, and with different threshold values. Here you have a sample of the result obtained for different values. You can compare with the result for the default value, which is the one we obtained in the hydrological analysis lesson.
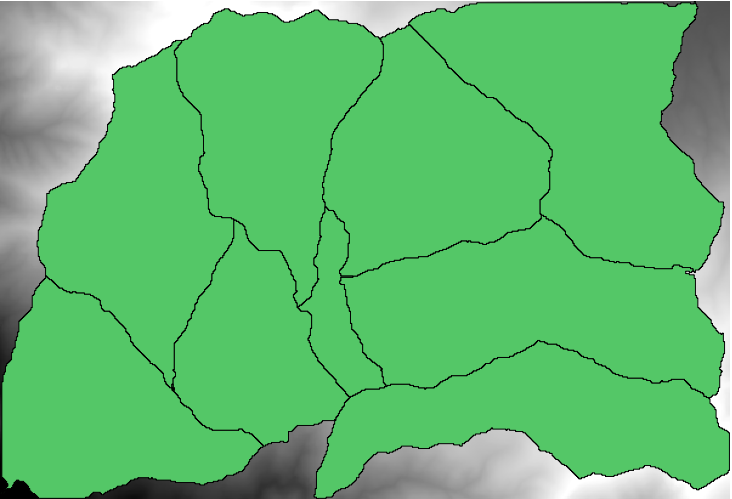
Prag = 100,000
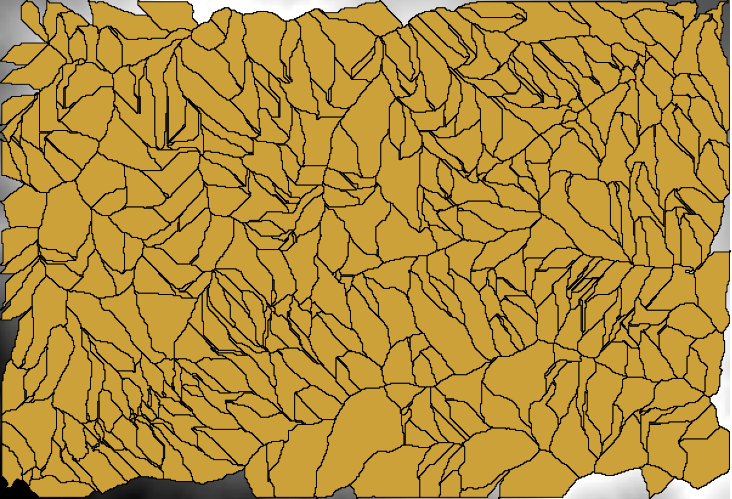
Prag = 1,0000,000