17.6. Reproiectarea CRS-urilor
Note
În această lecție, vom discuta despre modul în care Processing utilizează CRS-urile. Vom vedea, de asemenea, un algoritm foarte util: reproiectarea.
CRS-urile sunt o mare sursă de confuzie pentru utilizatorii QGIS Processing, așa că aici sunt câteva reguli generale cu privire la modul în care pot fi gestionate de către geoalgoritmi, la crearea unui nou strat.
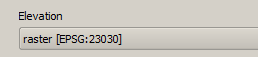
Dacă există straturi de intrare, se va utiliza CRS-ul primului strat. Acesta este presupus a fi CRS-ul tuturor straturilor de intrare, atât timp cât este necesar ca acestea să-l aibă pe același. În cazul în care utilizați straturi cu un CRS diferit, QGIS va emite un avertisment. Observați că CRS-ul straturilor de intrare este afișat alături de numele său, în dialogul parametrilor.
Dacă nu există nici un strat de intrare se va utiliza CRS-ul proiectului, cu excepția cazului în care algoritmul conține un câmp specific pentru CRS (așa cum s-a arătat în ultima lecție despre algoritmul reticular)
Open the project corresponding to this lesson and you will see two layers named 23030 and 4326. They both contain the same points, but in different CRSs (EPSG:23030 and EPSG:4326). They appear in the same place because QGIS is reprojecting on the fly to the project CRS (EPSG:4326), but they are not actually the same layer.
Deschide algoritmul Export/Adăugare coloane de geometrie.
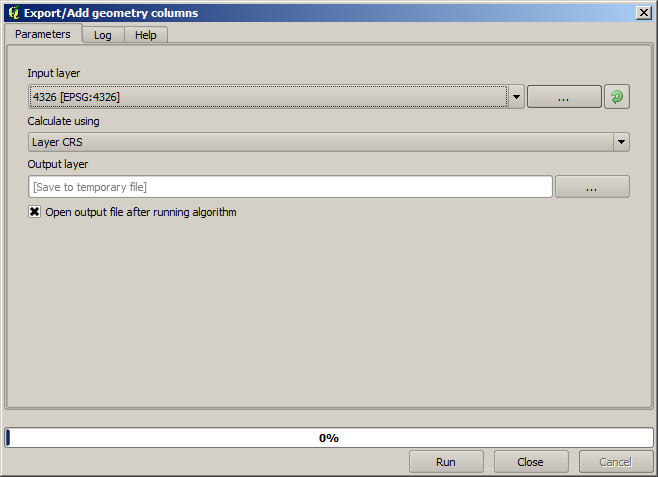
This algorithm add new columns to the attributes table of a vector layer. The content of the columns depend on the type of geometry of the layer. In the case of points, it adds new columns with the X and Y coordinates of each point.
In the list of available layers that you will find in the input layer field, you will see each one with its corresponding CRS. That means that, although they appear in the same place in your canvas, they will be treated differently. Select the 4326 layer.
The other parameter of the algorithm allows to set how the algorithm uses coordinates to calculate the new value that it will add to the resulting layers. Most algorithms do not have an option like that, and just use the coordinates directly. Select the Layer CRS option to just use coordinates as they are. This is how almost all geoalgorithms work.
You should get a new layer with exactly the same points as the other two layers. If you right click on the name of the layer and open its properties, you will see that it shares the same CRS of the input layer, that is, EPSG:4326. When the layer is loaded into QGIS, you will not be asked to enter the CRS of the layer, since QGIS already knows about it.
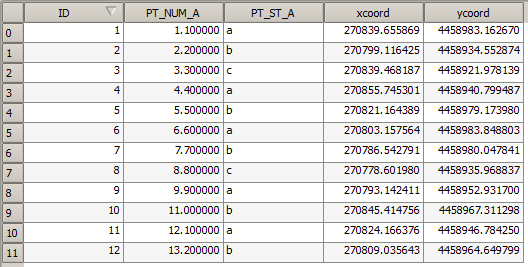
If you open the attributes table of the new layer you will see that it contains two new fields with the X and Y coordinates of each point.

Those coordinate values are given in the layer CRS, since we chose that option. However, even if you choose another option, the output CRS of the layer would have been the same, since the input CRS is used to set the CRS of the output layer. Choosing another option will cause the values to be different, but not the resulting point to change or the CRS of the ouput layer to be different to the CRS of the input one.
Now do the same calculation using the other layer. You should find the resulting layer rendered exactly in the same place as the other ones, and it will have the EPSG:23030 CRS, since that was the one of the input layer.
Dacă mergeți la tabela sa de atribute, veți vedea valori care sunt diferite de cele din primul strat pe care l-am creat.
Acest lucru se datorează faptului că datele originale sunt diferite (se folosește un alt CRS), și acele coordonate sunt preluate din ea.
What should you learn from this? The main idea behind these examples is that geoalgorithms use the layer as it is in its original data source, and completely ignore the reprojections that QGIS might be doing before rendering. In other words, do not trust what you see in the canvas, but always have in mind that the original data will be used. That is not so important in this case, since we are just using one single layer at a time, but in an algorithm that needs several of them (such as a clip algorithm), layers that appear to match or overlay might be very far one from each other, since they might have different CRSs.
Algorithms performs no reprojection (except in the reprojection algorithm that we will see next), so it is up to you to make sure that layers have matching CRS’s.
An interesting module that deals with CRS’s is the reprojection one. It represents a particular case, since it has an input layer (the one to reproject), but it will not use its CRS for the output one.
Deschide algoritmul de Reproiectare a stratului.
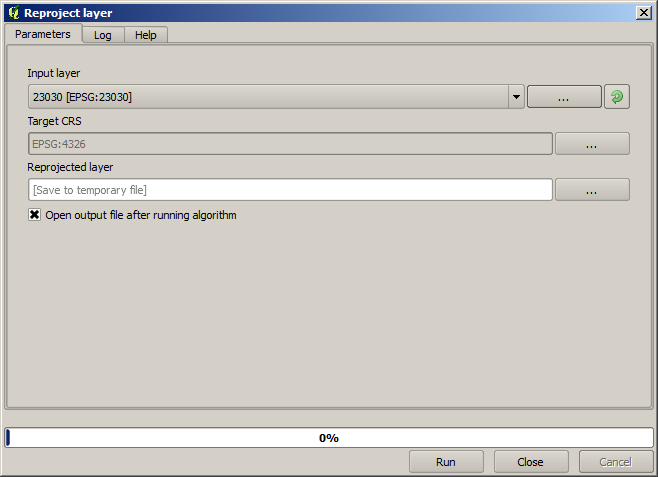
Select any of the layers as input, and select EPSG:23029 as the destination CRS. Run the algorithm and you will get a new layer, identical to the input one, but with a different CRS. It will appear on the same region of the canvas, like the other ones, since QGIS will reproject it on the fly, but its original coordinates are different. You can see that by running the Export/Add geometry columns algorithm using this new layer as input, and veryfing that the added coordinates are different to the ones in the attribute tables of both of the two layers that we had computed before.