17.3. 공간처리 프레임워크 설정
공간처리 프레임워크를 사용하기 전에 먼저 설정부터 해줘야 합니다. 설정할 것이 별로 없으므로, 쉬운 작업이 될 것입니다.
이후에 사용 가능한 알고리듬 목록을 확장하는 데 쓰이는 외부 응용 프로그램을 설정하는 방법을 배우겠지만, 이 시점에서는 프레임워크 자체만을 가지고 작업하겠습니다.
The processing framework is a core QGIS plugin, which means that, if you are running QGIS 2.0, it should already be installed in your system, since it is included with QGIS. In case it is active, you should see a menu called Processing in your menu bar. There you will find an access to all the framework components.

해당 메뉴를 찾을 수 없다면, 플러그인 관리자에서 활성화시켜야 합니다.

우리가 작업하게 될 주요 요소는 툴박스입니다. 상응하는 메뉴 항목을 클릭하면 QGIS 창의 오른쪽에 툴박스가 붙는 것을 볼 수 있습니다.
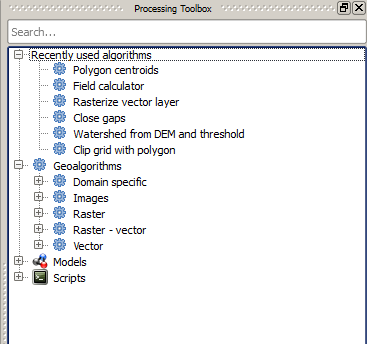
The toolbox contains a list of all the available algorithms, divided in groups. There are two ways of displaying and organizing those algorithms: the advanced mode and the simplified mode.
기본적으로 알고리듬이 수행하는 작업의 유형에 따라 그룹을 나누는 단순 모드를 보게 됩니다. 툴박스에 보이는 알고리듬 가운데 일부(사실 거의 대부분)는 다른 외부 응용 프로그램에 의존하고 있지만, 이 응용 프로그램에 대한 설명을 볼 수는 없습니다. 공간처리 프레임워크를 통해 알고리듬을 사용하는 일을 단순화시키는 단순 모드에서는 알고리듬의 기원이 숨겨져 있습니다.
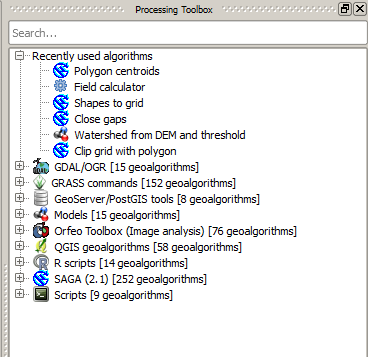
Examples in this guide only use the simplified mode. The advanced mode has some additional features and algorithms, but it requires understanding the applications that are called, so they are a more advanced topic. Some of these more advanced ideas are introduced in the final lessons of this book, but for the rest of them we will just use the simplified interface.
You can change between the simplified and the advanced mode by using the selector on the bottom part of the toolbox.
고급 모드를 사용할 때, 툴박스가 다음과 같이 보입니다.
이 시점까지 왔다면 이제 공간 알고리듬을 사용할 준비가 된 것입니다. 지금 다른 설정을 할 필요는 없습니다. 다음 강의에서 첫 번째 알고리듬을 실행해보겠습니다.